
Fixing Audio Issues: How to Restore Sounds in Google Chrome
Fix Apex Legends Audio Issues: Restore Game Sounds Today
No sound while playing Apex Legendson your PC ? You’re not alone! Many players are reporting it. But the good news is that you can fix it. Here are 5 fixes to try.
If you’re having audio issues on yourPS4 , check here .
If you’re on Xbox, checkhere .
Fixes to try
You may not have to try them all. Just work your way down the list until you find the one that works for you.
- Restart your computer
- Run the Windows audio troubleshooter
- Update your audio driver
- Restart Windows Audio Services
- Reinstall Apex Legends
Fix 1: Restart your computer
Some programs running in the background may conflict with Apex Legends, causing audio issues. In this case, try rebooting your computer to turn off unwanted programs completely. After your computer restarts, relaunch your game to check if you get the sound back. If not, read on and check the next fix.
Fix 2: Run the Windows audio troubleshooter
Another quick fix to Apex Legends audio problems is runningthe audio troubleshooter . Follow the instructions below:
What is the audio troubleshooter?
It’s aWindows built-in utility that can detect and fix common sound issues automatically.
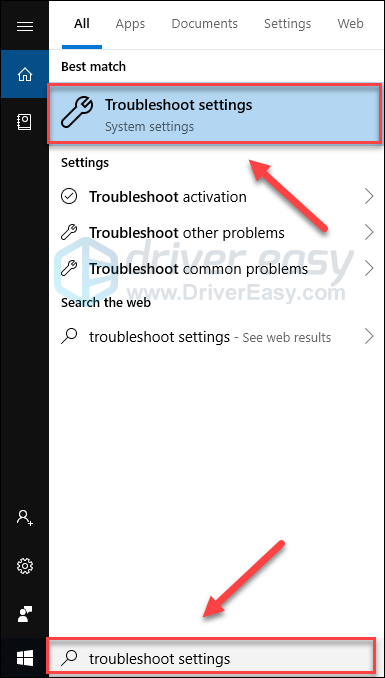
1) On your keyboard, press theWindows logo key and typetroubleshoot settings . Then, clickTroubleshoot settings .
2) ClickPlaying Audio , then clickRun the troubleshooter .
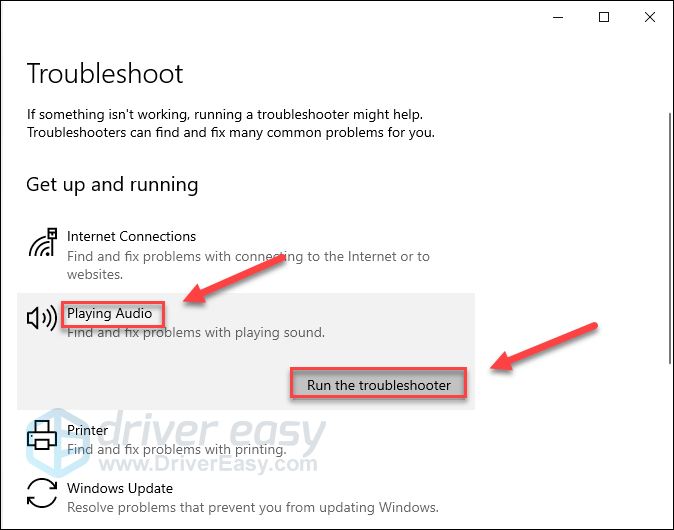
3) Follow the on-screen instructions to troubleshoot your problem.
If Windows fails to detect your issue, move on and try the fix below.
Fix 3: Update your audio driver
If you can’t hear any sound while gaming on Apex Legends, chances are that you’re using a wrong or outdated audio driver. It’s essential that you have the latest correct audio driver at all times.
There are two ways you can update your audio driver:
Option 1 – Manually – You’ll need some computer skills and patience to update your drivers this way, because you need to find exactly the right the driver online, download it and install it step by step.
OR
Option 2 – Automatically (Recommended) – This is the quickest and easiest option. It’s all done with just a couple of mouse clicks – easy even if you’re a computer newbie.
Option 1 – Download and install the driver manually
The manufacturer of your sound card keeps updating the driver. To get it, you need to go to the manufacturer’s website, find the driver corresponding with your specific flavor of Windows version (for example, Windows 32 bit) and download the driver manually.
Once you’ve downloaded the correct driver for your system, double-click on the downloaded file and follow the on-screen instructions to install the driver.
Option 2 – Automatically update your audio driver
If you don’t have the time, patience or computer skills to update the audio driver manually, you can do it automatically with Driver Easy .
Driver Easy will automatically recognize your system and find the correct driver for it. You don’t need to know exactly what system your computer is running, you don’t need to risk downloading and installing the wrong driver, and you don’t need to worry about making a mistake when installing.
You can update your driver automatically with either the FREE or the Pro version of Driver Easy. But with the Pro version it takes just 2 clicks:
1)Download and install Driver Easy.
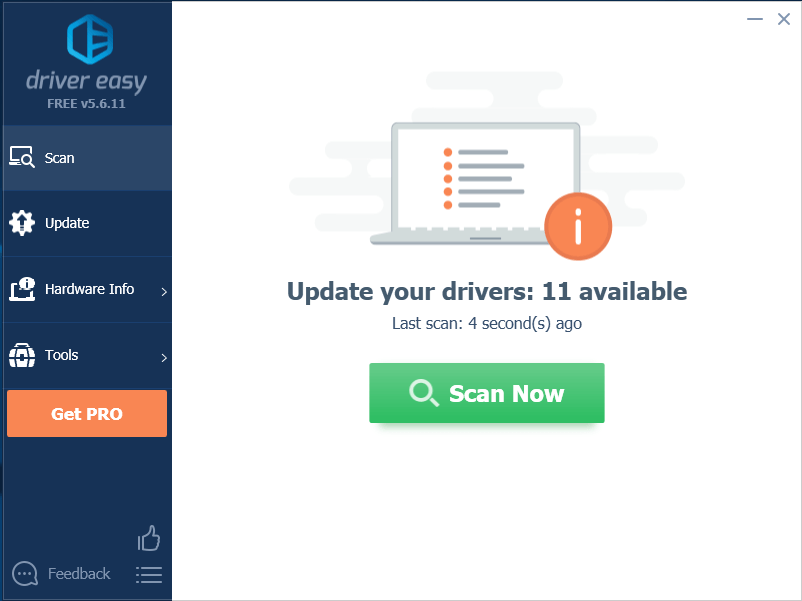
2) Run Driver Easy and click the Scan Now button. Driver Easy will then scan your computer and detect any problem drivers.
3) Click the Update button next to the audio driver to automatically download the correct version of that driver, then you can manually install it (you can do this with the FREE version).
Or click Update All to automatically download and install the correct version of all the drivers that are missing or out of date on your system. (This requires the Pro version which comes with full support and a 30-day money back guarantee. You’ll be prompted to upgrade when you click Update All.)

You can do it for free if you like, but it’s partly manual.
If you need assistance, please contact Driver Easy’s support team at [email protected] .
Fix 4: Restart Windows Audio Services
Some audio issues can also be addressed by restarting Windows Audio Services. To see if that works for you, follow the instructions below:
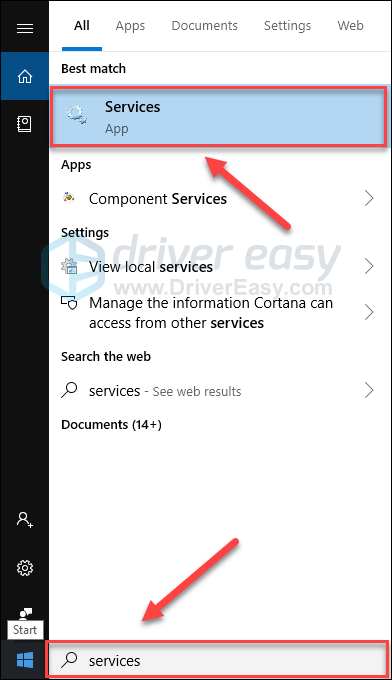
1) On your keyboard, press theWindows logo key and typeservices .
2) Right-clickWindows Audio , then selectRestart .
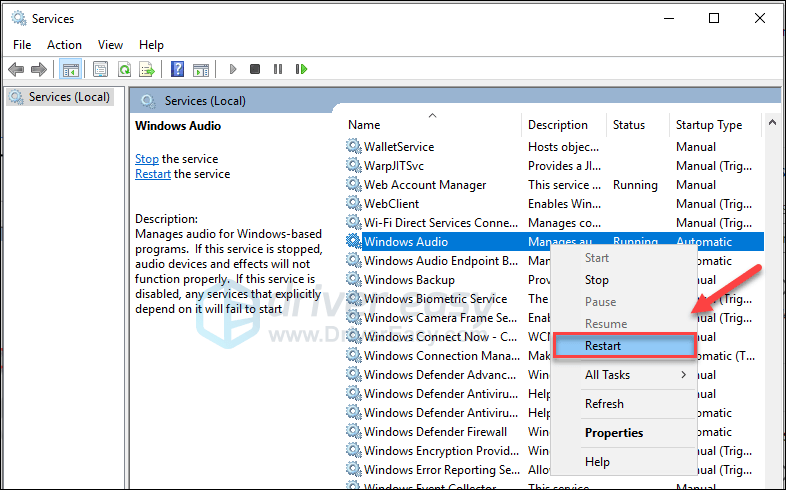
3) Relaunch your game to test your issue.
This should allow you to hear Apex Legends and everything else. If your issue still exists, don’t fret. There is still one more fix to try.
Fix 5: Reinstall Apex Legends
If none of the fixes above helped, reinstalling Apex Legends is very likely the solution to your issue. Here is how to do it:
1) RunOrigin .
2) ClickMy Game Library , right-clickApex Legends and selectUninstall .

3) After your game is uninstalled, restart your computer.
4) Run Origin again to download and install Apex Legends.
Hopefully, you’re able to play your game now. Enjoy! If you have any questions or suggestions, feel free to leave a comment below.
Also read:
- [New] 2024 Approved Essential Tools for Android & iOS Users Seeking Playlist Extractors
- [Updated] 2024 Approved Revolutionizing Your Approach to IPTV Viewership Saving
- [Updated] In 2024, Monetization Mastery - Top Youtubers Earnings
- 2024 Approved Perfecting the Art of GIF to Sticker Transition on Various Messaging Platforms
- 2024 Approved Unlock the Potential of VR Video on Your iPhone
- DIY Guide: Repairing a Malfunctioning Bose Sound System
- Effective Techniques to Get Your Corsair Virtuoso Mic Working Again
- Enhancing Boot Speed: Manipulating Boot Sequence Timer
- Guide to Fixing Audio Device Connection Errors on PCs Running Windows 11, 8 or 7
- How to Enable Audio for Call of Duty's Black Ops: Cold War When Playing on a Desktop PC [FIXED]
- How to Repair Broken Headset Audio on a Windows 10 PC
- HP Laptop Silent Problem Solved - Restore Sound with These Simple Fixes
- In 2024, FRP Hijacker by Hagard Download and Bypass your OnePlus 12 FRP Locks
- In 2024, How to Transfer Data After Switching From Vivo X100 to Latest Samsung | Dr.fone
- Löschen Von Foto-Uploads Auf Ihrem iPad Mit Einfachen Schritten - Tipps & Tricks
- Reviving the Sound: Fixing a Malfunctioning Razer BlackShark V2 Microphone
- The Ultimate Solution Manual: Restoring Microphone Capabilities in Bluetooth Headsets
- Troubleshooting Steps for Resolving Unable to Initialize Dolby Digital Sound on Windows 1N 10 Devices
- Unstoppable TF2 Gaming: No More Crashes - Expert Hacks Revealed!
- Title: Fixing Audio Issues: How to Restore Sounds in Google Chrome
- Author: Donald
- Created at : 2025-01-04 22:19:11
- Updated at : 2025-01-10 16:36:16
- Link: https://sound-issues.techidaily.com/fixing-audio-issues-how-to-restore-sounds-in-google-chrome/
- License: This work is licensed under CC BY-NC-SA 4.0.