
How to Fix a Nonfunctional Microphone for Skype in Windows 11
Unstuck at Last: Fix Windows 11’S Malfunctioning Microphone Today
We’ve seen users reporting the microphone not working after they updated to Windows 11. It’s a common issue, but not a hard one to fix. If you’re experiencing the same problem, you’ve come to the right place. In this article, we’ll show you how to troubleshoot this problem and get your microphone back to work.
Try these fixes…
You don’t have to try them all, just work your way down the list until you find the one that does the trick!
- 1: Configure the input device
- 2: Allow apps to access your microphone
- 3: Enable the microphone for recording
- 4: Update the audio drivers
- Bonus tip: Repair corrupted system files
Before we dive into any more advanced, make sure you go over some basic troubleshooting steps first.
1. If you’re using anexternal microphone , make sure it’s correctly connected to your PC.
2. If you’re using aheadset mi c, make sure it’s not set to mute on your headset.
Fix 1: Configure the input device
The first fix you can try is to set up the input device, the microphone you’re using, correctly and adjust the recording volume. Here’s how to do it on Windows 11:
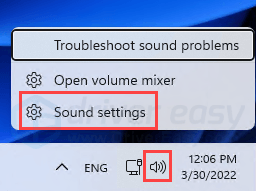
- Right-click thespeaker icon on the taskbar, and clickSound settings .

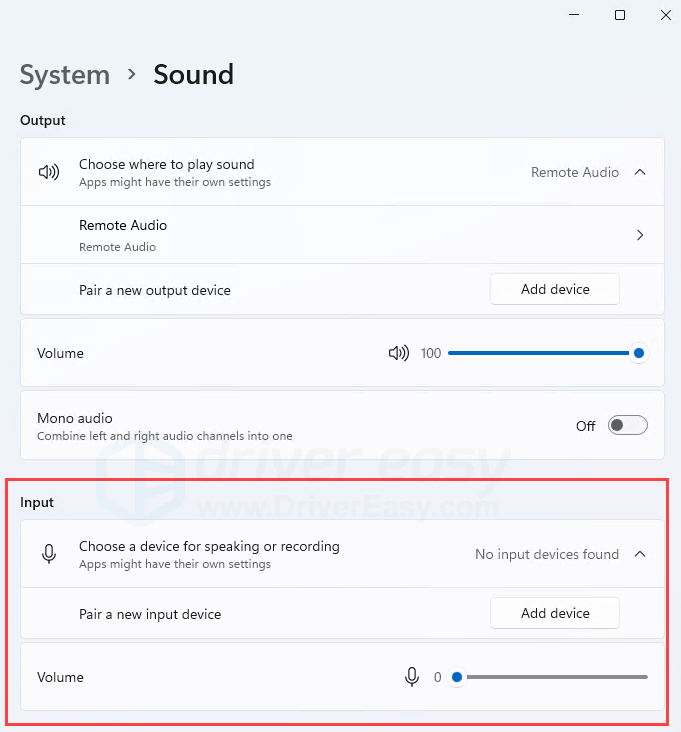
- In the input section,set the microphone you’re using as the input device . You can also turn the volume up to make sure the microphone can catch your voice clearly.
If you experience the microphone issue only while using a certain app, for example, Zoom or Discord, you can adjust the settings in-app. Similar to the steps above, you need to find the audio setting, choose the right input device, and adjust the input volume if needed.
You can check your microphone to see if it works now. If it doesn’t, move on to the next fix.
Fix 2: Allow apps to access your microphone
Users report that even if they set up the correct input device in an app, the microphone still won’t work. The possible reason is that the app doesn’t have access to your microphone on a system level. To allow the related program on Windows 11, here’s how:
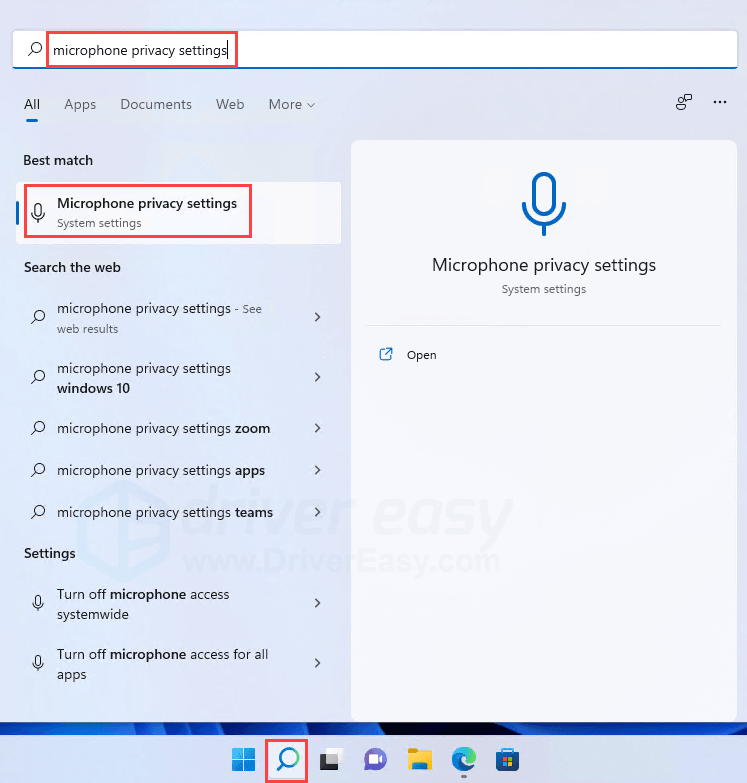
- Press theWindows logo key on your keyboard, orclick the magnifier icon on the taskbar . Then, search forMicrophone privacy settings .
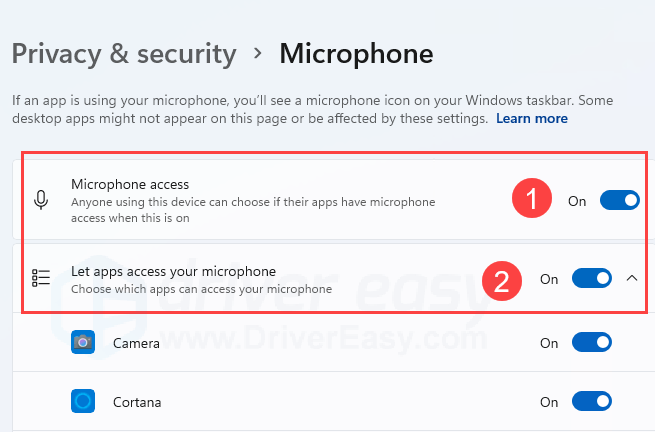
- Turn on the Microphone access and Let apps access your microphone options. You can scroll down and manage the microphone access to a specific app.
After allowing apps to use your microphone, you can restart the problem app and test if the issue is solved now. If not, try the next fix.
Fix 3: Enable the microphone for recording
Normally when you connect an external microphone, for example. a USB mic or your headset mic, to your computer, the device will be automatically recognized. But sometimes it just doesn’t, and you may need to manually enable the microphone for recording. Here’s how to do it on Windows 11:
- On the taskbar, right-click thespeaker icon and selectSound settings .
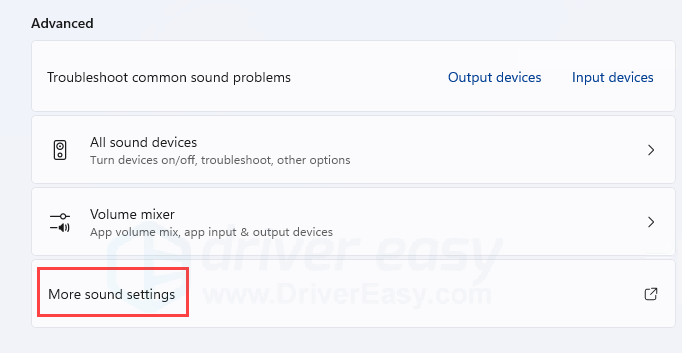
- Scroll down and clickMore sound settings .
3. Under theRecording tab , enable your microphone. If you can’t find it, right-click anywhere empty and selectShow Disabled devices .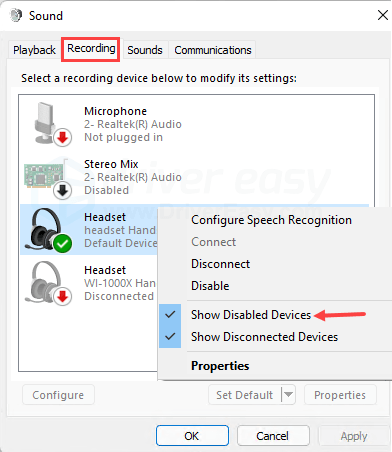
If this fix doesn’t solve your problem, try the next one.
Fix 4: Update the audio drivers
If you’ve tried the above fixes and nothing worked, chances are you need to update your audio driver, or install the device driver for your microphone. A faulty or outdated audio driver may trigger random audio problems and compatibility issues with sound devices.
There are two ways to check if you have the latest audio driver and update it if needed: manually and automatically.
Manual driver update – You can update your audio driver via Device Manager. Note that Windows doesn’t always detect and find you the latest available driver. Sometimes you need to search on the manufacturer’s website. Be sure to download and install the driver version corresponding to your Windows version.
Automatic driver update – If you don’t have the time, patience, or computer skills to update your driver manually, you can, instead, do it automatically with Driver Easy . Driver Easy will automatically recognize your system and find the most recent driver for your device as well as your Windows version. Then it will download and install the driver correctly.
You can update your drivers automatically with either the 7 days free trial or the Pro version of Driver Easy. It takes just 2 clicks, and you get full support and a 30-day money-back guarantee with the Pro version:
- Download and install Driver Easy.
- Run Driver Easy and click the Scan Now button. Driver Easy will then scan your computer and detect any problem drivers.
- Click theActivate & Update button next to the flagged device to automatically download and install the correct version of this driver.

Or click Update All to automatically download and install the correct version of all the drivers that are missing or out of date on your system (You’ll need the Pro version for this – when you select Update All, you’ll get a prompt to upgrade. If you’re not prepared to purchase the Pro version yet, Driver Easy provides a 7-day trial at no cost, granting access to all Pro features like fast downloads and easy installation. No charges will occur until after your 7-day trial period ends.)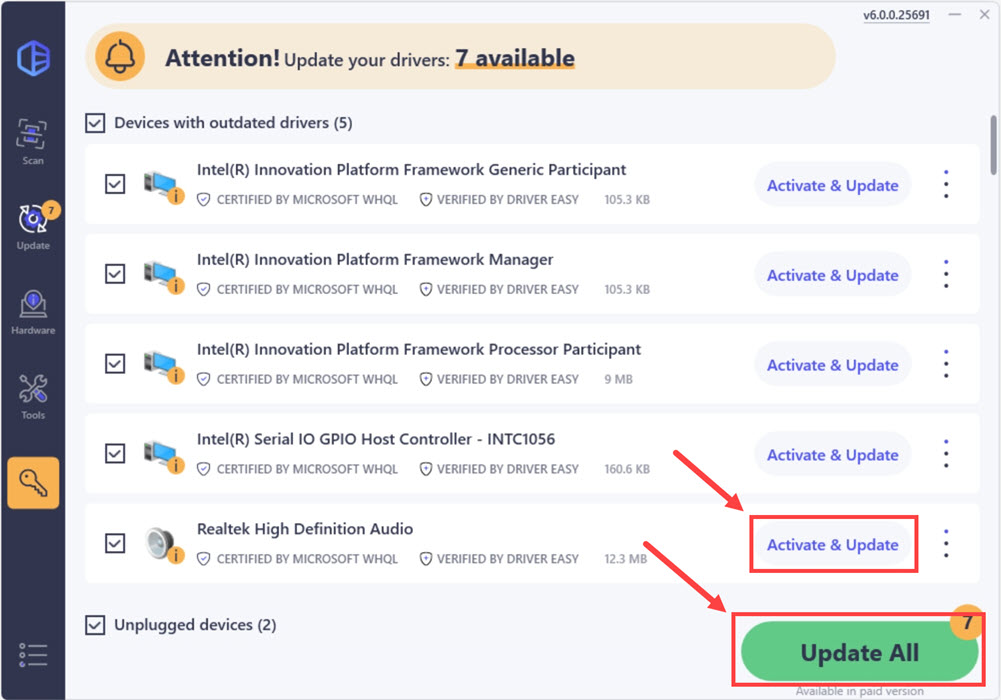
4. After updating, restart your computer to take effect.
ThePro version of Driver Easy comes withfull technical support . If you need assistance, please contact Driver Easy’s support team at [email protected] .
Bonus tip: Repair corrupted system files
Sometimes a system-wide issue where some system files are corrupted can affect the functioning of the microphone. It’s less common, and you can use the System File Checker tool (sfc /scannow) to look for any critical system corruption. However, manual repair is required most of the time.
To use a more powerful tool to repair your system, we recommend giving Fortect a try. It’s a professional system repair software that specializes in fixing Windows issues and problematic system files. Fortect can diagnose and fix corrupted system files and services without affecting personal data.
- Download and install Fortect.
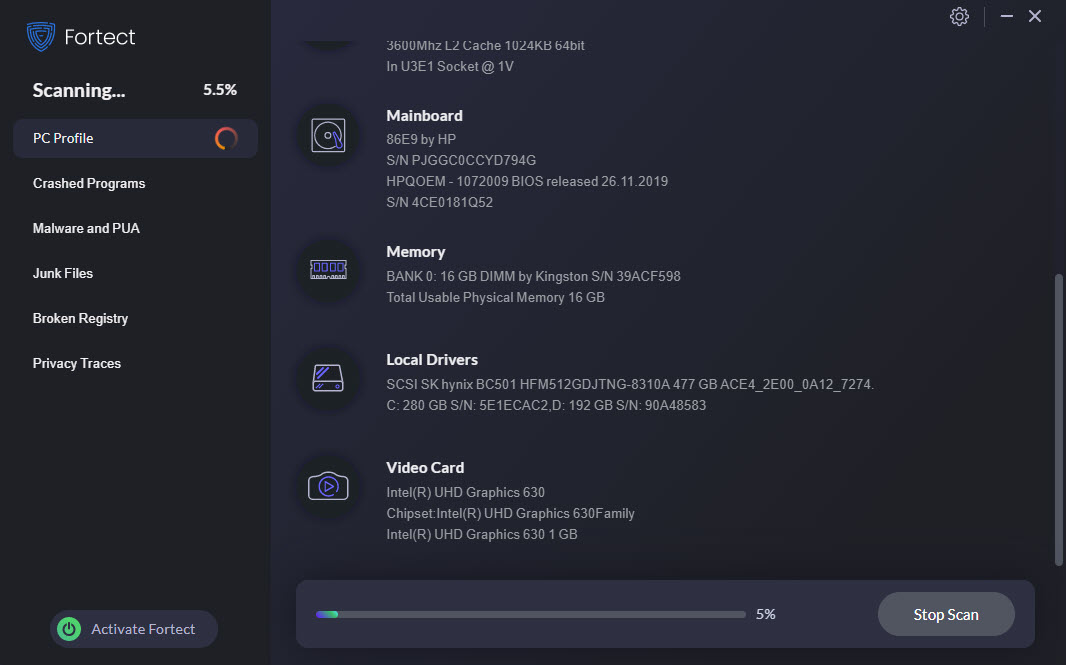
- Run the software. Fortect will start a deep scan of your system. The process may take a while.
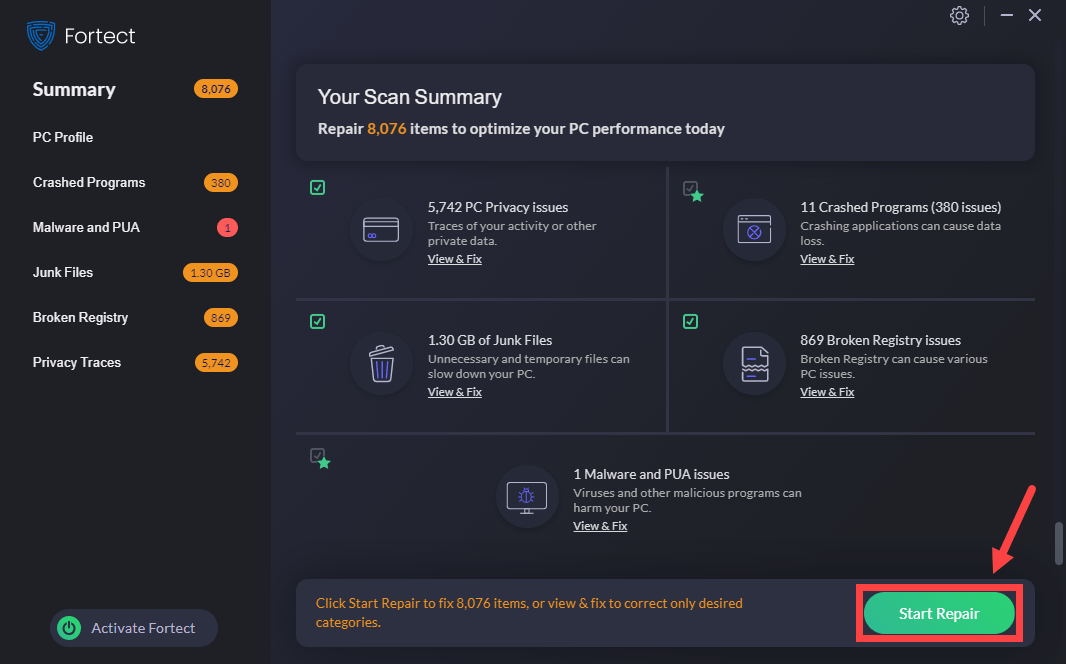
- Once the scan is complete, you can review the summary. If Fortect detects any missing or broken system files or other issues that may have caused the microphone or other sound issues, you can click START REPAIR to fix them.
The repair is available with the paid version of Fortect which comes with a 60-day money-back guarantee. If you encounter any issues while using Fortect, feel free to contact their support team.
Hopefully, this article helps! If you have any questions or suggestions, please feel free to leave us a comment down below.
Also read:
- [New] Step-by-Step Strategy for Quick Removal on YouTube
- Decode & Defend Against Recurring Glitches: Stability Hacks for Days Gone
- How to Fix a Non-Functional Microphone on the SteelSeries Arctis 1 Headset
- How To Repair and Improve PC Microphone Issues in Rec Room
- How to Resolve an Unconnected Nvidia Output - Top Tips & Solutions
- In 2024, How to Screen Mirroring Oppo Find X6 to PC? | Dr.fone
- New Unlocking the Secrets to Finding Your Ideal Mac MP3 Information Editor for 2024
- Restoring Harmony: Steam Deck and Cloud Synching
- Trouble with Noisy Meetings? Restore Sound in Zoom on Your Desktop Computer
- Unmasking Online Follower List
- Title: How to Fix a Nonfunctional Microphone for Skype in Windows 11
- Author: Donald
- Created at : 2025-01-14 17:11:58
- Updated at : 2025-01-15 20:41:29
- Link: https://sound-issues.techidaily.com/how-to-fix-a-nonfunctional-microphone-for-skype-in-windows-11/
- License: This work is licensed under CC BY-NC-SA 4.0.