Resolving HDMI Connection Problems When Your Device Is in Use by Other Software
Solving the Problem: Unstuck Your Voice Chat in Destiny 2 Today
Recently, Bungie has released a new update for Destiny 2 and enabled cross-play voice chat. However, still some players reported that the in-game voice chat is not working when they join a fire team. If you happen to be one of them, don’t worry. In this post, we’ve gathered some working fixes for you.
Try these fixes
You may not need to try them all; simply work your way down the list until you find the one that works for you.
- Perform basic troubleshooting
- Check the Voice Chat settings
- Check your Stadia or Windows 10 Privacy Settings
- Update your audio driver
- Reset your audio settings (Console)
- Check your sound settings (PC)
- Restart Windows Audio Service
- Disable any VPNs
Note: The screenshots below have been mostly taken from a Windows 10 operating system. If you are using Windows 11, please be aware that the visual appearance of your screen may vary slightly, but the steps to perform the task remain consistent.
Fix 1: Perform basic troubleshooting
If you’re having trouble hearing your friends using in-game voice chat when playing Destiny 2, you should check the following first:
- Check your speaker and headphone connections for loose cords or cables. Make sure all cords and cables are plugged in.
- Try unplugging and re-plugging your headphones or speaker.
- If your device comes with amic switch , make sure it’sturned on .
- Xbox players will need to use anXbox Certified headset to successfully connect and participate in voice chat.
After confirming that your audio device is not the problem, go ahead with the fixes below.
Fix 2: Check the Voice Chat settings
Some players found that the voice chat setting seems to carry over from Steam to console clients. This means that if you have ever logged into the game through Steam and disabled voice chat, then you may encounter the issue of in-game voice chat not working on your console. To fix this problem, you may have to log into the game through Steam and re-enable voice chat in settings. Here’s how:
- Log into Destiny 2 through Steam.
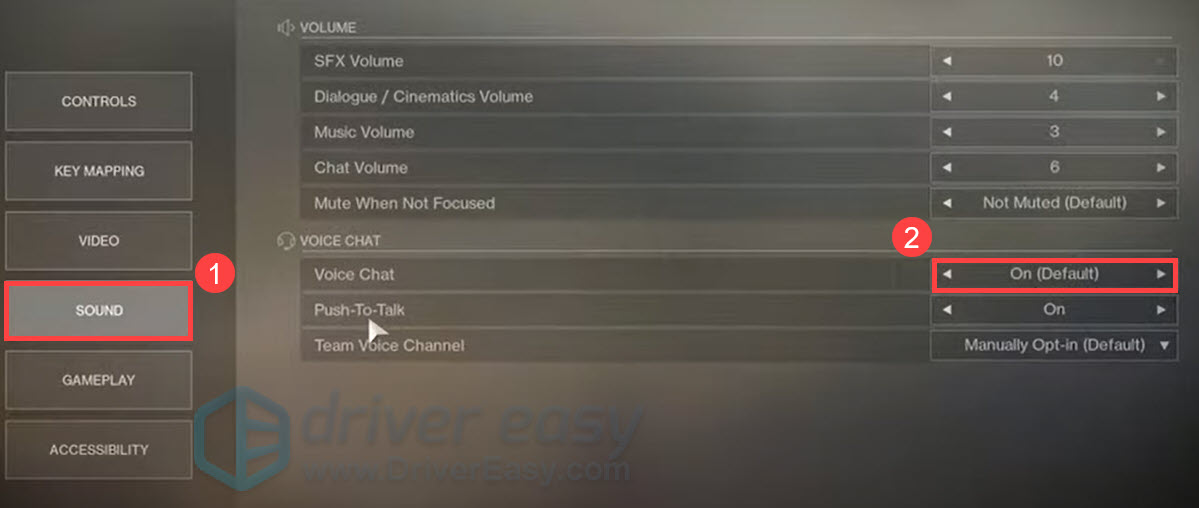
- OpenSettings menu, then selectSOUND and turn onVoice Chat .

- Close the game on PC, and then relaunch it on your console.
Now check if voice chat functions properly.
If this method doesn’t solve your problem, simply continue to the next fix.
Fix 3: Check your Stadia or Windows 10 Privacy Settings
If you play Destiny 2 on Stadia or Windows 10, make sure your privacy settings are configured properly to allow the game to access your microphone. Here’s how:
Stadia
- Navigate to StadiaSettings .
- SelectPrivacy .
- Ensure that “Who can send you voice chat and party invites ” is not set to Private.

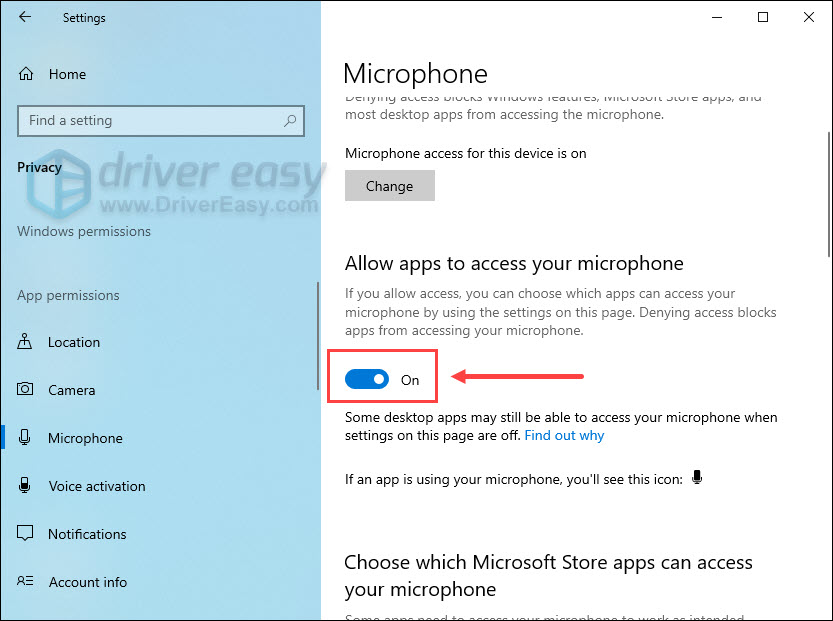
Windows 10
- If Destiny 2 is open, close the game entirely.
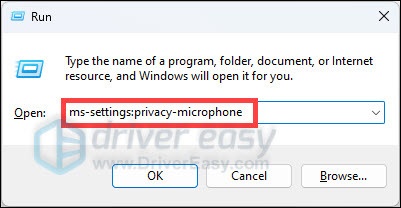
- On your keyboard, press theWindows logo + R keys simultaneously to open the Run box.
- Typems-settings:privacy-microphone and hit Enter.
- UnderAllow apps to access your microphone , make sure the toggle is set toON . If not, you can click theChange button above to turn it on.
- Scroll down the list of apps below that toggle to findDestiny 2 . Make sure it is also toggled toON .
- Relaunch the game and check if the in-game voice chat is working.
If this fix doesn’t do the trick, move on to the next one.
Fix 4: Update your audio driver
The voice chat not working issue could indicate that you’re using a faulty or outdated audio driver. If you can’t remember the last time you updated your drivers, definitely do it now as this might solve your problem right away.
There are mainly 2 ways to update your audio driver: manually or automatically .
Option 1: Update your audio driver manually
If you’re familiar with computer hardware, you can go straight to the manufacturer’s website for your headset and search for the most recent correct driver. Once you’ve downloaded the correct driver for your system, double-click on the downloaded file and follow the on-screen instructions to install the driver.
Option 2: Update your audio driver automatically (Recommended)
If you don’t have the time, patience or computer skills to update your audio driver manually, you can, instead, do it automatically with Driver Easy . Driver Easy will automatically recognize your system and find the correct drivers for your exact device, and your Windows version and it will download and install them correctly:
- Download andinstall Driver Easy.
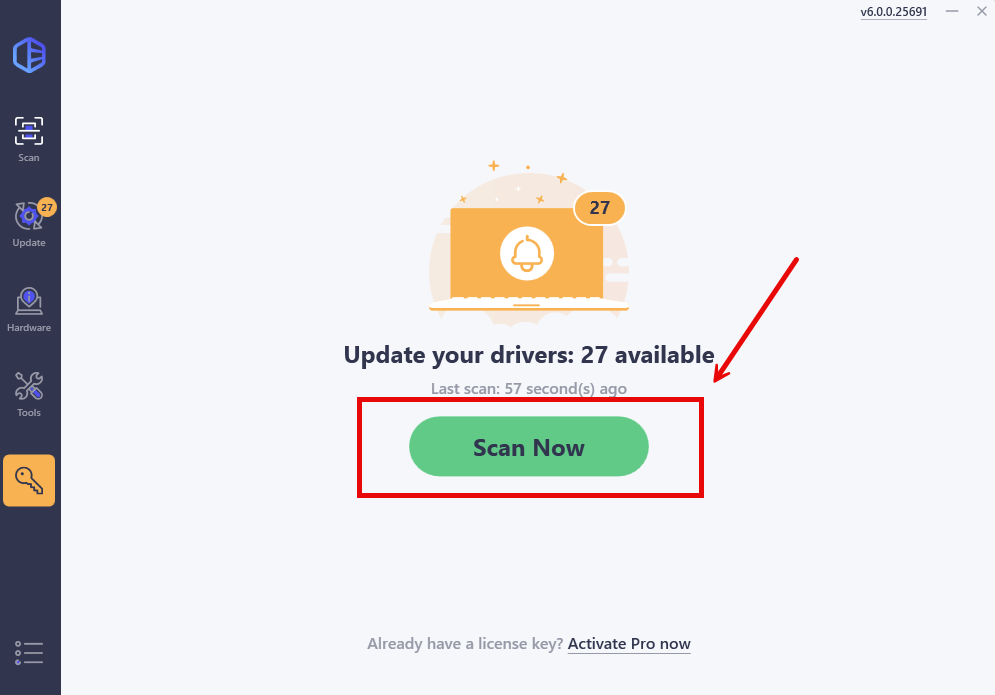
- Run Driver Easy and click theScan Now button. Driver Easy will then scan your computer and detect any problem drivers.
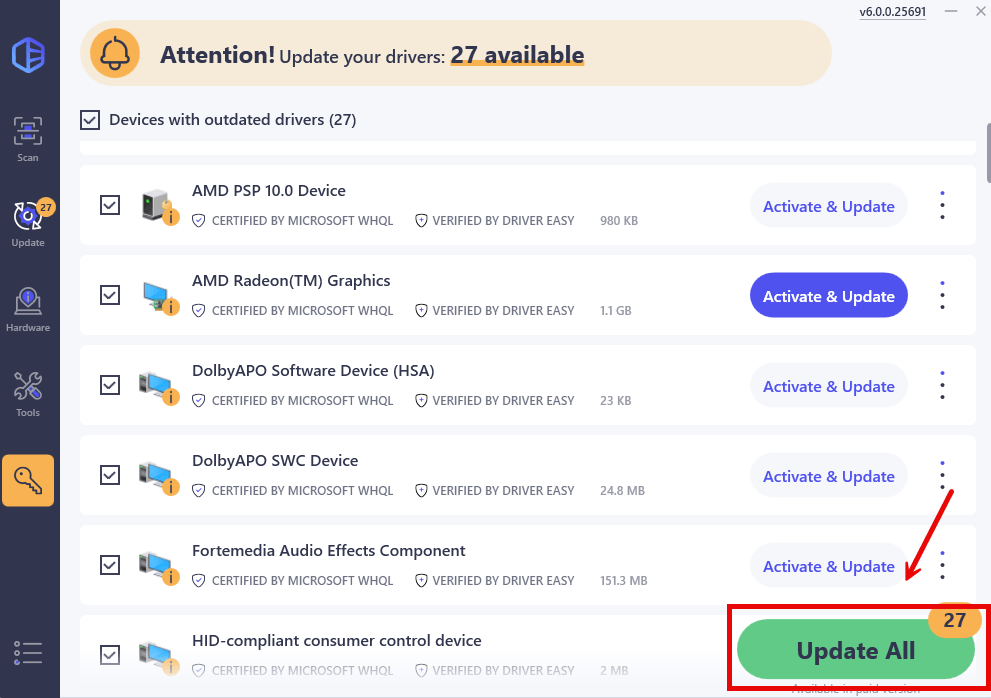
- ClickUpdate All to automatically download and install the correct version of all the drivers that are missing or out of date on your system.
(This requires the Pro version which comes with full support and a 30-day money-back guarantee. You’ll be prompted to upgrade when you click Update All. If you’re not ready to buy the Pro version, Driver Easy offers a 7-day free trial which includes access to all the Pro features such as high-speed download and one-click install. You won’t be charged anything until your 7-day trial has ended.)
4. Restart your computer for the changes to take effect.
The Pro version of Driver Easy comes with full technical support . If you need assistance, please contact Driver Easy’s support team at [email protected] .
Once you’ve updated your audio driver, restart your PC and test if you can talk with your friends in Destiny 2.
If this solution doesn’t work for you, check out the next fix.
Fix 5: Reset your audio settings (Console)
Some players reported that they fixed the cross-play voice chat not working issue by resetting their audio settings. You can give it a shot. Here’s how:
PS4 or PS5:
Go to in-game sound settings, then hold thesquare button to reset it to default.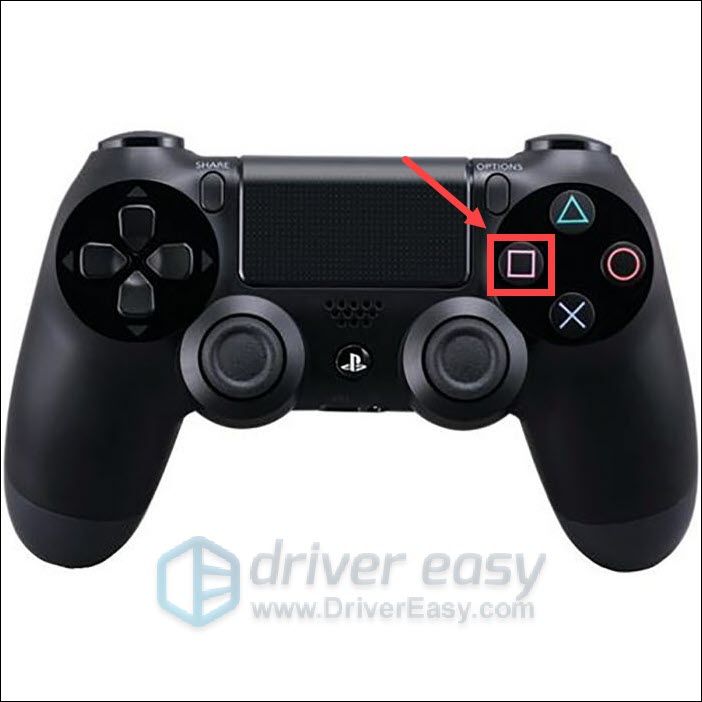
Xbox:
Go to in-game sound settings, then select the “reset to default ” button in the bottom right.
Now you can check if the voice chat feature works properly in Destiny 2.
If this method still gives you no luck, take a look at the next one.
Fix 6: Check your sound settings (PC)
If your device is muted or disabled by mistake, you may encounter the issue of Destiny 2 voice chat not working. To see if that’s the case, you need to check the sound settings on your computer. Besides, make sure your microphone is listed as the default device. Here’s how:
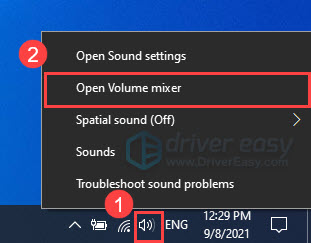
- On your taskbar, right-click theSpeakers icon and selectOpen Volume mixer .
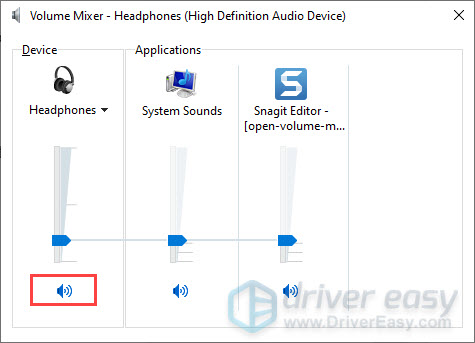
- You’ll see a set of volume controls for your devices. Make sure none of them are muted.
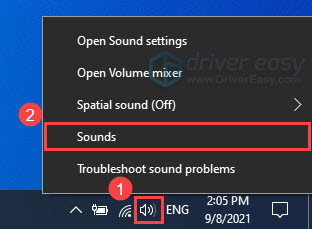
3. Right-click theSpeakers icon again and selectSounds .
4. Choose thePlayback tab,select the headphones you want to use, and click Set Default.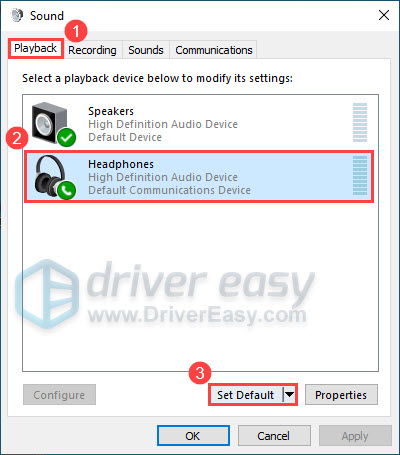
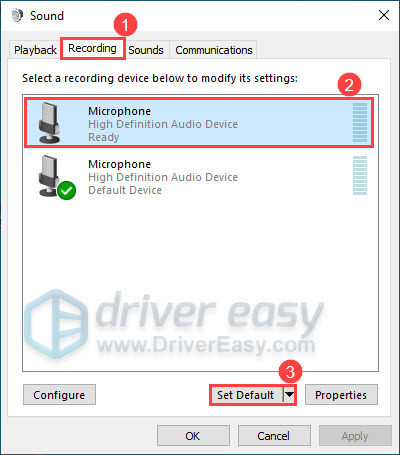
5. Navigate to the Recording tab, select the microphone you want to use, and clickSet Default .
6. ClickOK to save changes.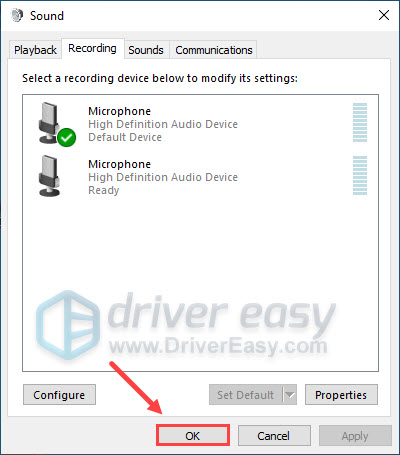
After everything is set up correctly, restart Destiny 2 to see if your audio issue is resolved.
If not, continue to the next fix.
Fix 7: Restart Windows Audio Service
Windows Audio service manages audio devices for Windows-based programs. If this service is stopped, your audio devices will not function properly. To fix the voice chat not working issue, you can try restarting this service. Here’s how:
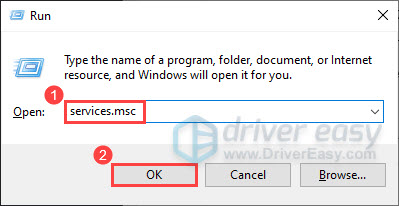
- On your keyboard, press theWindows logo key andR at the same time to invoke the Run dialog box. Then typeservices.msc and clickOK .
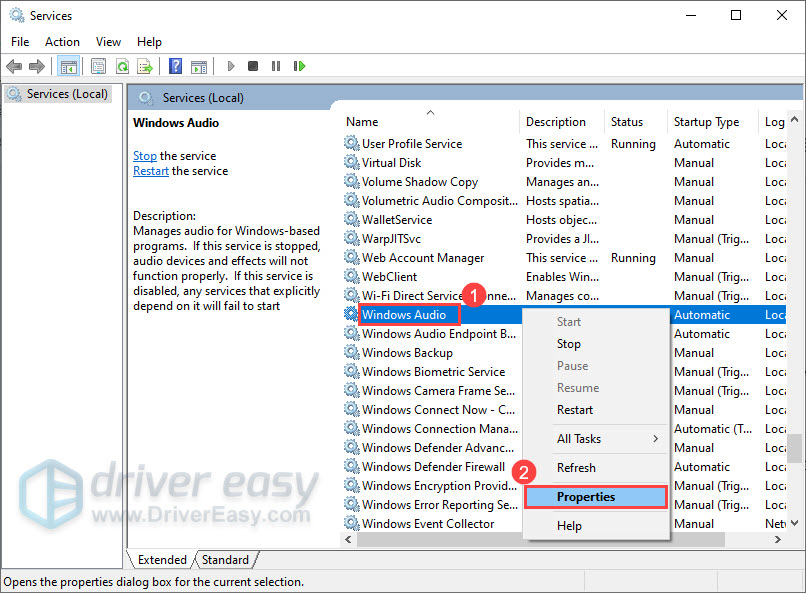
- In the pop-up window, scroll down the services list and locateWindows Audio . Then right-click on it and selectRestart .
- Check that your microphone is now working.

- If your microphone doesn’t work, right-clickWindows Audio and selectProperties .
- In the Windows Audio properties window, check if theStartup type is set to Automatic. If not,set it to Automatic and clickOK to save the changes.

Once done, restart your computer and launch Destiny 2 to see if this solves the problem.
If the issue remains, try the next fix.
Fix 8: Disable any VPNs
The Destiny 2 in-game voice chat not working issue could also be caused by the VPN you’re using. To see if that’s the case, you can temporarily disable your VPN and test if the in-game chat goes back to normal.
If it works, then you may have to avoid using any VPNs while playing Destiny 2 or try contacting your VPN support team for help.
That’s it – hopefully, this post helped. If you have any questions, ideas, or suggestions, you’re more than welcome to leave us a comment below.
Also read:
- [New] Cutting-Edge Creations Pro Tips for TikTok Editors
- [New] In 2024, Cutting-Edge Techniques for Capturing PS4 Games in OBS
- [SOLVED] Black Ops Cold War Voice Chat Not Working
- [Updated] Saving Reels Made Simple Direct and Indirect Techniques Explained
- 2022'S Ultimate Guide to Professional-Grade Background Editing Applications for Windows Users
- Boosting Audio Volume on Your Windows 11 PC: A Step-by-Step Guide
- Expert Advice: Fixing Your Broken Logitech G430 Microphone in Simple Steps
- In 2024, How to Transfer Videos from Honor Play 40C to iPad | Dr.fone
- In 2024, The Essential WMP Routine for CDs Ripping & Batch Processing
- In 2024, Tricks to Make Your Profile Video Stand Out
- Rapid Growth Recipe for YouTube From Thousands to Millions
- Rekindle the Roaring Gunfire – Resolving Borderlands 3'S Sound Issues on Windows
- Revive Your Laptop's Sound: Effective Solutions for Unresponsive Built-In Speakers
- Silence No More: A Comprehensive Fix for Battlefield 4 Audio Glitches
- Solving the Silent Dilemma: A Guide to Restoring Audio on Your PC Using Intel's Conexant Technology
- Top 11 Brain Games Engaging Trivia Channels
- Troubleshooting No Sound Problems for a Smooth Experience with Firefox
- Troubleshooting Tips: Resolving Windows 11 Microphone Issues Easily
- Unfolding Details on the Next-Gen Foldable iPhone: Pricing Predictions, Availability Date, and Feature Overview
- Title: Resolving HDMI Connection Problems When Your Device Is in Use by Other Software
- Author: Donald
- Created at : 2024-11-19 22:13:05
- Updated at : 2024-11-24 17:30:35
- Link: https://sound-issues.techidaily.com/resolving-hdmi-connection-problems-when-your-device-is-in-use-by-other-software/
- License: This work is licensed under CC BY-NC-SA 4.0.